This is the procedure a machine goes through here before it gets a grade and a listing — written out in full, because a used-hardware seller who will not tell you how they test is asking you to take the grade on trust. Six steps, in order, with what each result rules in or out.
It is deliberately the seller-side view. If you have just taken delivery of a machine and want to know what to check while the claim window is still open, that is the acceptance test; if you only want the short list of figures worth recording, that is the measurements that matter.
Step 1: Prepare Your Workspace and Gather Tools
Before you power on a single ASIC miner for testing, you need a clean, organized workspace and the right diagnostic tools at your fingertips. Setting up properly takes maybe an hour, but it saves you from costly mistakes and gives you reliable data about whether your hardware actually performs as expected. Think of this as building the foundation for all the testing work ahead.
Start by designating a specific testing area in your home or small operation. This doesn’t need to be fancy, but it should be flat, stable, and protected from dust and moisture. A workbench, folding table, or even a sturdy desk works fine. The goal is to keep your ASIC miner off the floor and away from spills. You’ll want adequate lighting so you can spot physical damage, corrosion, or debris on the hardware. Natural daylight is great, but a desk lamp or LED work light gives you control and lets you inspect components closely.
A clean, static-safe workspace prevents hardware damage before testing even begins.
Gather your diagnostic and safety tools before you touch the hardware. You’ll need a power supply unit (PSU) rated appropriately for your miner’s requirements, a multimeter to verify voltage outputs, and thermal paste if you plan to inspect or reseat heatsinks. Keep a flashlight or magnifying glass handy for examining solder joints, chip connections, and any visible wear. You should also have compressed air or soft brushes ready to clean dust from the miner’s cooling fins and fans without damaging delicate components. Setting up a controlled workspace with proper diagnostic equipment is the foundation of effective testing.
Static electricity poses a real threat to ASIC components, so set up anti-static protections before you begin. Wear an anti-static wrist strap grounded to a metal part of your workbench, or touch a grounded metal object frequently to discharge static buildup. An anti-static mat under your work area adds another layer of protection. This might sound overly cautious, but a single static discharge can permanently damage expensive ASIC chips without leaving visible marks. You won’t know the problem exists until you power the miner on and it fails to work correctly.
Organize your workspace with these essentials:
- Testing equipment: Power supply, multimeter, thermal imaging camera (optional but useful)
- Cleaning supplies: Compressed air, isopropyl alcohol, soft brushes, lint-free cloths
- Documentation: Pen and notebook or digital device to record findings from each test
- Safety gear: Anti-static wrist strap, mat, and grounded workspace setup
- Hand tools: Flashlight, magnifying glass, small screwdrivers (if you’ll open the casing)
Arrange these items within arm’s reach so you’re not fumbling around or leaving your grounded position. Keep cables organized and out of the way. You want to minimize movement and keep your attention on the miner itself. Many issues show up during visual inspection before you ever plug anything in, so take your time walking around the hardware and looking for physical damage, loose connections, or signs of previous repairs.
One final step: know what you’re looking for before you start. Jot down the miner’s model, expected specifications, and any known issues from the seller or previous owner. This becomes your reference point throughout testing. You’ll compare actual measurements against these expectations to determine whether the hardware meets your standards. Without this baseline, you won’t know if performance deviations are normal variation or genuine defects.
Pro tip: Document your workspace setup with photos, including your grounding setup and tool placement, so you can maintain consistency across multiple miners and quickly set up again on future testing days.
Step 2: Connect Mining Hardware and Verify Power
Now that your workspace is ready, it’s time to physically connect your ASIC miner to power and verify that electricity flows to the unit exactly as it should. This step tells you whether the miner will even turn on and whether the power delivery chain is intact. If something goes wrong here, you’ll catch it immediately instead of discovering problems after the hardware is fully operational.
Start by examining the power connectors on both the miner and your power supply unit. ASIC miners typically use standard connectors like PCIe 6-pin or 8-pin connectors, or proprietary connectors depending on the model. Check for corrosion, bent pins, loose wiring, or debris inside the connectors. A corroded connection will create resistance and heat, potentially damaging the miner or failing to deliver full power. If the connectors look questionable, clean them gently with isopropyl alcohol and allow them to dry completely before proceeding. Don’t force connections. If a connector feels stiff or doesn’t seat smoothly, inspect it more carefully rather than jamming it in.
Before plugging anything into your wall outlet, verify that your PSU is rated for the miner’s power requirements. Most ASIC miners draw between 800 watts and 3,500 watts depending on the model. Your PSU should exceed the miner’s peak power draw by at least 10 percent to avoid stress on the power supply itself. Check the PSU specifications on the unit or in its documentation. Connect the PSU to your miner using the appropriate connectors, ensuring each connection clicks or seats firmly. Double-check that all connections are secure by gently tugging on each connector to confirm it won’t slip loose.
Loose power connections are a common cause of intermittent failures and hardware damage.
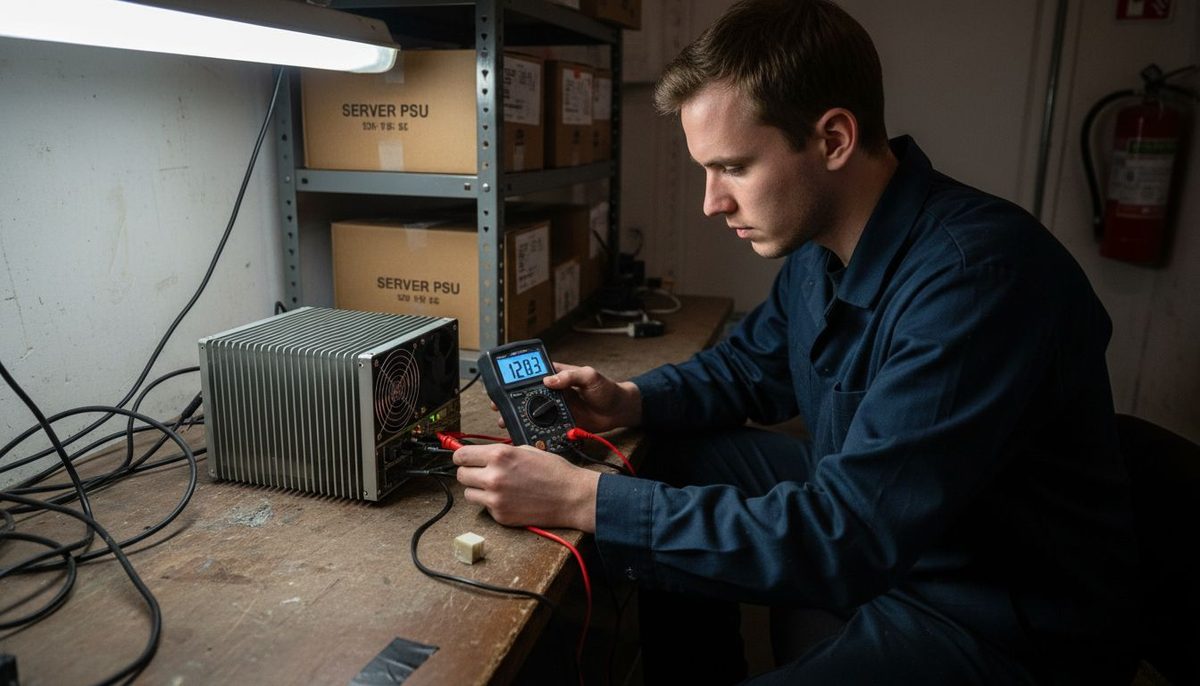
Now use your multimeter to verify voltage output before turning anything on. Set your multimeter to DC voltage mode and measure the output at the power connectors while the PSU is plugged in but the miner is not yet powered on. You should read the expected voltage (typically 12 volts for standard connectors). If you read zero or a significantly different voltage, stop immediately and check your connections. A multimeter reading tells you that power is actually reaching the miner’s connectors before you risk running the hardware. This single verification step prevents you from powering on a miner with faulty wiring or a bad PSU.
Arrange your setup like this:
- Connect the PSU to your miner’s power input connector with a firm, secure click
- Verify voltage at the connector using a multimeter before powering anything on
- Inspect all connectors for corrosion, bent pins, or visible damage
- Check for loose wires by gently tugging each connection
- Confirm PSU capacity matches or exceeds the miner’s power requirements
Once you’ve verified voltage at the connectors, you can power on the miner. Plug the PSU into your wall outlet and switch it on. Watch for the miner to boot up. You should see indicator lights appear (usually red, green, or blue LEDs depending on the model). The cooling fans should spin up within seconds. Listen for unusual noises like grinding, clicking, or excessive grinding sounds that might indicate mechanical failure. Let the miner run for a few minutes while you monitor its behavior. If the unit powers off unexpectedly, shuts down immediately, or shows error lights, stop and investigate the connection points again.
Once the miner is running, measure voltage at the connectors again using your multimeter. Under load, the voltage may drop slightly, but it should remain within the manufacturer’s acceptable range (usually within 5 percent of the rated voltage). If voltage drops significantly below spec, you have a connection issue, a failing PSU, or a problem with the miner’s power delivery system. Document these readings in your notes. They become part of your test baseline and help identify problems later.
If everything powers on smoothly and voltage remains stable, you’re ready to move forward with monitoring hash rate and temperature. If you encounter issues here, verify connectors, check your PSU specifications, and test with a different PSU if available. Effective troubleshooting methods help isolate whether the problem is the miner, the PSU, or the power connections themselves.
Pro tip: Keep a photo record of your voltage readings at the connectors before and after powering on, and note the exact readings in your test log so you can spot anomalies if you test the same miner again months later.
Step 3: Configure Network Settings and Miner Firmware
With your miner powered on and running, you now need to connect it to your network and access its control interface to configure firmware settings. This is where you tell the miner where to send its work and how to operate, and it’s where you’ll monitor real-time performance data during testing. Without proper network configuration, your miner is just a machine drawing power without actually mining anything.
First, connect your miner to your network. Most ASIC miners connect via Ethernet cable, which provides the most stable connection. Plug an Ethernet cable from your router or network switch directly into the miner’s network port. Avoid wireless connections for mining hardware because they introduce latency and instability that can interrupt work submissions and reduce overall reliability. If your miner supports both Ethernet and Wi-Fi, always choose wired Ethernet for testing. Once the cable is connected, the miner will attempt to receive an IP address from your router’s DHCP server, usually within a few seconds. You should see network activity lights on the miner or on your router indicating data transfer.
You need to find the miner’s IP address to access its web interface. Open a terminal or command prompt on your computer and ping your miner’s hostname if you know it, or check your router’s connected devices list to see what IP address was assigned. Many miners use default hostnames like “antminer” or model-specific names depending on the manufacturer. Alternatively, you can scan your network using tools like Advanced IP Scanner to discover the miner’s IP address. Once you have the IP, open a web browser and type the IP address into the address bar (for example, http://192.168.1.100). This opens the miner’s web interface where you can configure settings and monitor performance.
Network configuration determines how your miner communicates with mining pools and submits completed work.
You’ll arrive at a login screen. The default username and password are usually “admin” and “admin” for most manufacturers, but check your miner’s documentation for specifics. After logging in, you’ll see the miner’s dashboard displaying current hash rate, temperature, fan speed, and other operational metrics. This is where testing really begins because you can now observe how the hardware behaves under load. Before configuring pool settings, update the firmware to the latest version if available. Firmware updates often include bug fixes, stability improvements, and performance optimizations. Check the manufacturer’s website or the settings menu for available firmware versions. Download the appropriate firmware file for your exact miner model and follow the update instructions carefully. Updating firmware is a critical step because outdated versions may contain known issues that affect reliability.
Configure your mining pool settings once firmware is updated. You’ll need to enter your mining pool’s address, your username or wallet address, and your password if required. Here’s what you typically need:
- Pool URL – The mining pool’s server address (for example, stratum+tcp://pool.example.com:3333)
- Worker name – Your username at the pool (for example, “username.worker1”)
- Pool password – Usually “x” or a specific password depending on your pool
- Backup pool – An optional secondary pool if your primary pool goes offline
Enter these settings carefully. A single typo in the pool address or username prevents your miner from connecting and submitting work. Once entered, save the settings and the miner will begin communicating with your mining pool. Watch the dashboard to confirm the miner connects successfully. You should see shares being submitted (accepted or rejected) and the pool difficulty displayed. If the miner fails to connect, double-check your pool settings against your pool account information.
Let the miner run for at least 30 minutes to 1 hour while you monitor the dashboard. Record the hash rate, temperature, and accepted shares. Configuring your specific miner model correctly ensures you’re testing with proper settings that match real-world operation. If the hash rate is significantly below the manufacturer’s specifications, the miner may have hardware issues that warrant further investigation. If temperature climbs above the manufacturer’s recommended maximum, you may have cooling or airflow problems. Stable hash rate, reasonable temperatures, and consistent share submissions over 30 minutes indicate your network configuration is working and the miner is performing as expected during this testing phase.
Pro tip: Screenshot the dashboard with full details including hash rate, temperature, and share count at the 15-minute, 30-minute, and 60-minute marks, then compare these images later to verify consistency and detect any anomalies that might indicate intermittent hardware failures.
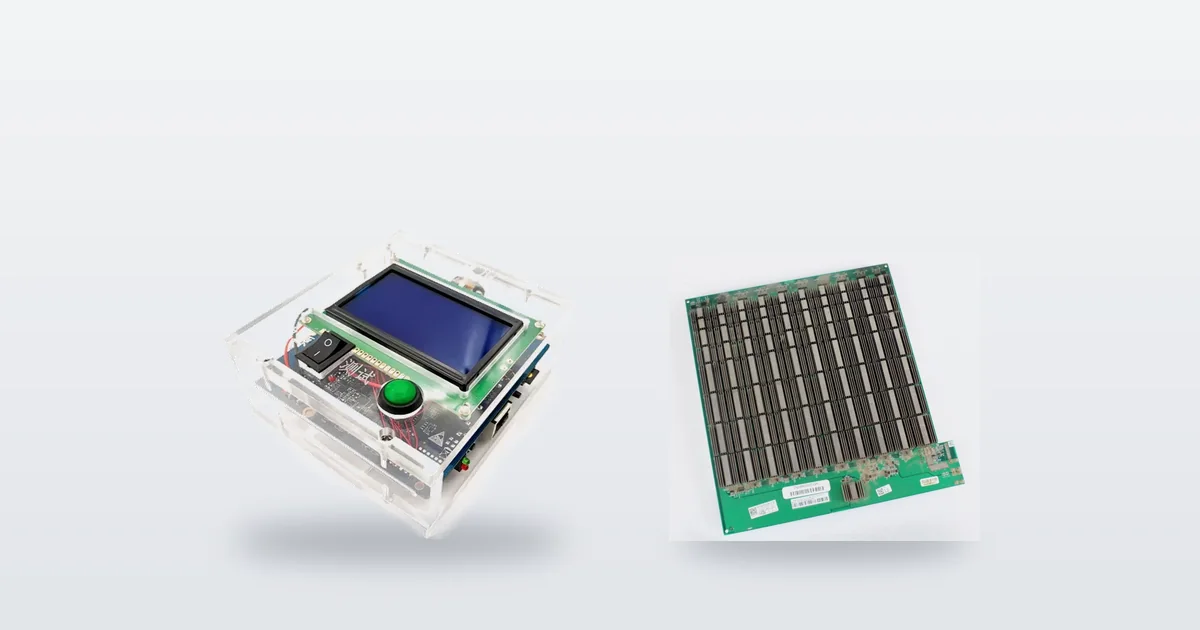
Diagnostic output is much easier to read when you know what the chips are doing. What’s inside an ASIC miner explains hashboard layout and why per-chip temperature and voltage readings tell you more than the headline hashrate. When a test points at one component, our parts compatibility guide covers what fits the machine — hashboards, APW12 against APW17 supplies, control boards and fans.
Step 4: Run Diagnostic Tests and Monitor Output
Now that your miner is connected and submitting work to a pool, it’s time to run structured diagnostic tests to verify that hardware performance matches manufacturer specifications and remains stable under sustained load. This is where you separate miners that will operate reliably for months from units that will fail prematurely. Diagnostic testing reveals inconsistencies and anomalies that casual observation misses.
Start by establishing a baseline measurement of your miner’s core performance metrics. Open the miner’s web dashboard and record these values at the beginning of your test session. Document the hash rate displayed on the dashboard, the current temperature of each chip or the average chip temperature, the fan speed as a percentage or RPM, and the voltage readings if available. Write these values down or take a screenshot so you have a reference point. The hash rate should be within 5 to 10 percent of the manufacturer’s stated specifications under normal conditions. If your miner claims 100 terahashes per second but only delivers 75 terahashes, you have a significant problem that needs investigation.
Let the miner run for a minimum of 4 hours while you monitor output continuously. During this time, check the dashboard every 30 minutes and record the same metrics. You’re looking for three critical indicators of reliability. First, hash rate consistency means the output remains stable and doesn’t fluctuate wildly from one reading to the next. Small variations of 1 to 3 percent are normal, but drops of 10 percent or sudden spikes suggest unstable operation. Second, temperature stability indicates that cooling is working effectively. If temperatures climb throughout the test or exceed the manufacturer’s recommended maximum, your miner has a thermal problem. Third, error logs and rejection rates show whether the miner is producing valid work. A high percentage of rejected shares (above 5 percent) signals that the miner is computing incorrectly or there’s a network issue.
Stress testing over extended hours separates reliable hardware from units destined to fail in production.
Running comprehensive diagnostic tests includes monitoring hash rate, voltage levels, temperature sensors, and error logs to identify inconsistencies that signal hardware or firmware issues. If you have access to a thermal imaging camera, use it to examine the heatsinks and chip areas for hot spots that indicate uneven cooling or solder defects. Look for temperature variations greater than 10 degrees Celsius across the chip surface, which might reveal problem areas. Use your multimeter to verify that voltage at the miner’s power connectors stays within manufacturer specifications throughout the test. Voltage should not drift more than 5 percent from the nominal rating. If voltage sags under load or spikes unexpectedly, you may have power delivery issues or a failing PSU.
Document your observations in a structured format so you can reference them later:
For easier selection, here’s a comparison of common ASIC miner diagnostic tools and their use:
| Tool | Primary Use | Typical Placement |
|---|---|---|
| Multimeter | Test voltage stability | Power connectors |
| Thermal Imaging Camera | Detect hot spots | Heatsinks, chips |
| Sound Meter App | Monitor noise changes | Near miner fans |
| Infrared Thermometer | Confirm surface temperature | Heatsinks, components |
- Hour 1 readings – Hash rate, temperatures, fan speed, voltage, accepted shares
- Hour 2 readings – Same metrics to identify trends
- Hour 3 readings – Check for temperature creep or hash rate degradation
- Hour 4 readings – Final baseline to confirm stability over sustained operation
- Error observations – Note any restart events, thermal throttling, or rejected shares
- Visual inspection notes – Any unusual behavior, noise changes, or component observations
After 4 hours, stop the test and let the miner cool down for 15 minutes. Check the error logs on the dashboard to review any issues that occurred automatically without your observation. Many ASIC miners log temperature warnings, voltage faults, or chip errors that provide valuable diagnostic information. If you see consistent warnings about specific chips or power domains, that miner has identifiable defects. Once cooled, restart the miner and run a second 4-hour test cycle. Seeing the same performance metrics in a second test cycle confirms that the miner operates reliably and isn’t just performing well by chance.
If your miner passes both 4-hour test cycles with stable hash rate within specification, consistent temperatures below maximum, and minimal error messages, you can confidently say the hardware is functioning as designed. If you observe hash rate below spec, temperatures above maximum, high rejection rates, or error logs filled with warnings, the miner requires further investigation or should be rejected. The time you invest in thorough diagnostic testing prevents you from deploying faulty hardware into your operation where it will waste electricity and generate zero income.
Pro tip: Export the miner’s detailed log file at the end of each 4-hour test cycle and compare logs between test runs to spot recurring error patterns that might not be obvious from dashboard readings alone.
Step 5: Check Cooling Systems and Noise Levels
Your ASIC miner generates significant heat, and if that heat isn’t managed effectively, the hardware will throttle performance or fail entirely. This step evaluates whether the cooling system is working properly and whether noise levels indicate mechanical problems. A miner that runs hot or sounds wrong is telling you something is wrong before it stops working altogether.
Begin by visually inspecting the cooling system while the miner is running. Look at both intake and exhaust fans to confirm they’re spinning smoothly without wobbling or grinding. The fans should spin consistently without stuttering or stopping. If a fan starts and stops repeatedly, it’s failing and needs replacement. Use your eyes and ears to watch for debris clogging the air intake or exhaust vents. Dust buildup on the heatsinks reduces cooling efficiency dramatically. If you see visible dust accumulation, shut down the miner and use compressed air to clean the fins and vents carefully. Never use a vacuum on electronics because static discharge can damage components. Compressed air blown in short bursts works far better and is safer.
Cooling assessment involves checking fan speeds and ensuring cooling systems handle the miner’s heat output to prevent thermal throttling and hardware damage. Check the fan speed reported on the miner’s dashboard. Most ASIC fans operate between 20 and 100 percent speed depending on temperature. If the dashboard shows a fan speed of zero percent while the miner is hot, that fan has failed. If a fan is running at 100 percent constantly and temperatures are still climbing, your cooling capacity is insufficient for the environment. Ideally, you want fans running at 40 to 70 percent speed, which indicates efficient cooling without excessive noise or component stress.
Measure the miner’s operating temperature using both the dashboard reading and an infrared thermometer if you have one. Point the thermometer at the heatsink surface (not directly at the fans) to get an accurate surface temperature. The dashboard temperature reading and your infrared reading should be reasonably close, within 5 to 10 degrees Celsius. If they differ significantly, the dashboard sensor might be faulty. Check the manufacturer’s specifications for the maximum operating temperature. Most ASIC miners should operate between 50 and 85 degrees Celsius. If temperatures exceed 85 degrees Celsius, thermal throttling will reduce hash rate to protect the chips. If temperatures exceed 95 degrees Celsius, you risk permanent hardware damage. Temperatures above these levels mean your cooling is inadequate for your environment.
Stable operating temperatures prevent thermal throttling and maintain consistent hashing performance.
Now assess the noise level. ASIC miners are inherently loud machines because they push air aggressively to cool dense chipsets. A baseline noise level of 75 to 85 decibels is normal for most mining hardware. But you need to listen for the character of that noise. Smooth, consistent fan noise is fine. Grinding, squeaking, clicking, or rattling noises indicate mechanical problems. These sounds suggest bearing failure, loose components, or resonance issues. Turn off the miner and physically inspect the mounting points and fasteners to see if anything is loose. Tighten any loose screws or bolts. If noises persist after tightening, a fan bearing is likely failing and the fan needs replacement.
Evaluate cooling in these categories:
- Fan operation – Both intake and exhaust fans spinning smoothly without stuttering or grinding
- Air intake cleanliness – No visible dust or debris blocking airflow into the miner
- Heatsink condition – Fins are clean and not clogged with dust or debris
- Temperature stability – Operating temperature stays below 85 degrees Celsius under load
- Noise character – Consistent fan noise without grinding, clicking, or squeaking
- Fan speed percentage – Dashboard shows fans running between 40 and 70 percent speed
Run the miner for at least 2 hours while monitoring temperature continuously. Record the temperature every 15 minutes. You’re looking for temperatures that remain stable or gradually reach equilibrium. If temperatures climb steadily throughout the 2-hour period, your cooling is unable to keep up with heat generation. If temperatures spike suddenly, a sensor might be faulty or a thermal interface has failed. Once you complete your 2-hour cooling assessment, allow the miner to cool down naturally for 30 minutes and compare the final temperature to your starting point. Stable temperatures that return to baseline after shutdown indicate healthy cooling. Rising baseline temperatures across multiple tests suggest thermal paste degradation or internal blockage.
Pro tip: Use a sound meter app on your smartphone to record baseline noise levels at the start of testing, then compare noise readings throughout the testing period to detect bearing degradation before it becomes audible as grinding.
Step 6: Evaluate Results and Confirm Stable Operation
You’ve gathered hours of performance data, temperature readings, and operational metrics. Now it’s time to analyze what all that information actually means and decide whether this miner is reliable enough for deployment. This evaluation separates hardware that will operate profitably for months from units that will cause headaches and financial loss.
Start by compiling all your test data into a single document or spreadsheet. Pull together the hash rate readings you recorded every 30 minutes during each test cycle, the temperature data from every 15-minute interval, the fan speed percentages, voltage measurements, and the error log summaries. Calculate the average hash rate across all your readings. If you performed two 4-hour test cycles, average the hash rates from both sessions. Compare this average to the manufacturer’s stated specification. The average should fall within 5 percent of the published number. If your average is 95 percent of spec or higher, that’s acceptable. If it’s more than 10 percent below spec, the miner has a genuine performance problem that needs investigation or rejection.
Next, examine temperature consistency by looking at whether your recorded temperatures remained stable or climbed throughout testing. Plot your hourly temperature readings on a graph or simply review them chronologically. Stable temperatures that hover within a 5 to 10 degree Celsius range indicate healthy operation. Rising temperatures across hours suggest that cooling can’t keep up, and the miner will eventually thermally throttle or fail. Temperatures that exceeded 85 degrees Celsius at any point mean the cooling system is inadequate for your environment. Temperatures above 95 degrees Celsius indicate serious problems. Check whether the miner recovered to baseline temperature within 30 minutes of shutdown. Failure to cool down suggests internal heat retention or blocked airflow.
Evaluating test results comprehensively ensures the miner operates stably without crashes or performance drops. Review your error logs and document the types and frequencies of errors encountered. Some error logs contain transient warnings that don’t affect operation. Other logs show persistent chip errors, thermal warnings, or power delivery faults that indicate real problems. Count the number of errors per hour of operation. Fewer than 5 errors per 24 hours of continuous operation is acceptable. More than 20 errors per 24 hours suggests unstable hardware that will fail under production conditions.
Miners meeting specifications across hash rate, temperature, and error metrics are ready for production deployment.
Analyze your uptime data next. Did the miner run continuously throughout each test cycle without unexpected restarts or shutdowns? Calculate the percentage of time the miner was hashing versus idle or down. Production-ready hardware should maintain 99.5 percent uptime or higher during testing. If your miner restarted unexpectedly or disconnected from the pool, investigate the cause. Check logs for thermal throttling events, power delivery warnings, or network errors. A single unexpected restart is concerning. Multiple restarts across test cycles indicates a miner destined to fail in production.
Create a summary of your findings in this format:
Here’s a summary table to help you quickly evaluate ASIC miner diagnostic results by key metric:
| Metric | Passing Criteria | Warning Signs | Action Required |
|---|---|---|---|
| Average Hash Rate | Within 5% of spec | 5-10% below spec | Investigate hardware or setup |
| Temperature | Below 85°C, stable | Climbs or exceeds 85°C | Improve cooling |
| Uptime | 99.5%+ during test | Unexpected restarts or downtime | Check logs, troubleshoot |
| Error Log | Fewer than 5 errors/24 hours | More than 20 errors/24 hours | Replace or repair hardware |
- Average hash rate – Your calculated average versus manufacturer spec
- Temperature baseline – Highest temperature reached, stability over time
- Error count – Total errors across all test hours
- Uptime percentage – Percentage of time actively hashing versus idle
- Fan performance – Typical operating speed, any unusual behavior
- Power consumption – Actual measured watts versus manufacturer estimate
- Notable issues – Any anomalies, mechanical problems, or unexpected behavior
Once you’ve summarized all metrics, answer this question honestly: Does this miner meet all manufacturer specifications and demonstrate stable operation without crashes, thermal issues, or excessive errors? If your answer is yes to all criteria, the miner is tested and verified as reliable. You can confidently deploy it into production knowing it will operate as designed. If your answer is no to any criterion, the miner requires further investigation. Consider whether the problem is fixable (dirty fans, loose connections, outdated firmware) or whether the miner should be rejected because it has fundamental hardware defects.
Document your final decision and the reasoning behind it. Photograph your test setup, your data sheets, and your final readings. Keep this documentation for your records. If the miner fails later, you’ll want evidence that you tested it properly and it performed within spec at the time of testing. If the miner succeeds in production, this documentation becomes your baseline for comparison if problems develop months later.
Pro tip: Create a simple pass/fail checklist with specific numeric thresholds before you start testing, then score each miner against that checklist after testing concludes to remove emotion from acceptance decisions.
Ensure Reliable ASIC Miner Performance with Professional Testing and Proven Hardware
Testing mining hardware effectively requires attention to power stability, temperature control, hash rate consistency, and network configuration. Many miners face frustration from unstable hash rates, overheating, or hidden defects that only reveal themselves after costly deployment. If you want to avoid expensive downtime and maximize profitability you need trusted hardware that has already passed thorough inspection and diagnostic testing.
ING Mining specializes in sourcing and professionally refurbishing ASIC miners that meet strict performance standards. Our units undergo detailed testing covering power delivery, firmware updates, cooling system evaluation, and real-world hash rate validation. We empower customers with transparent data and expert guidance to ensure every purchase meets rigorous reliability criteria. Whether you are a home miner or scaling a commercial operation see our selection of professionally tested used ASIC miners and gain peace of mind with hardware built to perform.
Stop risking your operation on unverified hardware. Visit ING Mining used miners today to explore our inventory and benefit from hardware tested against industry benchmarks. Act now to secure miners validated for stable operation, efficient cooling, and consistent hash rates so you can focus on growing your mining success.
Frequently Asked Questions
How do I prepare my workspace for testing ASIC mining hardware?
Start by designating a clean, organized space that is stable and away from dust and moisture. Gather necessary tools, including a power supply, multimeter, and anti-static equipment, to ensure a safe and effective testing environment.
What should I check after connecting my ASIC miner to power?
Verify that all power connections are secure and check for voltage output using a multimeter before powering on the miner. This ensures that electricity is flowing correctly, preventing potential damage to the hardware during operation.
How can I determine if my ASIC miner is performing reliably?
Run structured diagnostic tests while monitoring key metrics like hash rate, temperature, and error logs over several hours. If the miner maintains stable performance within manufacturer specifications, it indicates reliable operation for deployment.
What are the signs of cooling system failure in my ASIC miner?
Look for irregular fan operation, rising temperatures above recommended limits, and unusual noise levels. If the fans are not spinning smoothly or temperatures exceed 85 degrees Fahrenheit, it may indicate a cooling issue that needs immediate attention.
How do I evaluate the test results effectively before deploying my miner?
Compile all performance metrics, including average hash rate and temperature stability, into a single document. Compare these with manufacturer specifications, and summarize any anomalies or errors to make an informed decision about deployment readiness.
What actions should I take if my ASIC miner doesn’t meet performance standards?
Investigate specific issues such as cleaning fans, checking connections, or updating firmware if performance is not within acceptable ranges. If problems persist after troubleshooting, consider rejecting the unit due to fundamental hardware defects.
Recommended
- Why Test Mining Hardware: Maximizing Profitability
- 7 Essential Steps for Testing ASIC Miners Effectively
- diagnosing ASIC faults by symptom
- the mining workflow, power first
The test gear we actually use
Everything below is what we actually bench with, and all of it is in stock:
- K8 ASIC Multifunctional Tester – Hashboard, PSU and Signal Fault Diagnostic Tool
- K9 Multifunctional Tester – ASIC Hashboard and Smart PSU Tester, 70+ Models
- AM3352 Chip Tester Texas Instruments Microprocessor Control ASIC Repair Tool
More in Need Parts, or the full ASIC miner inventory.